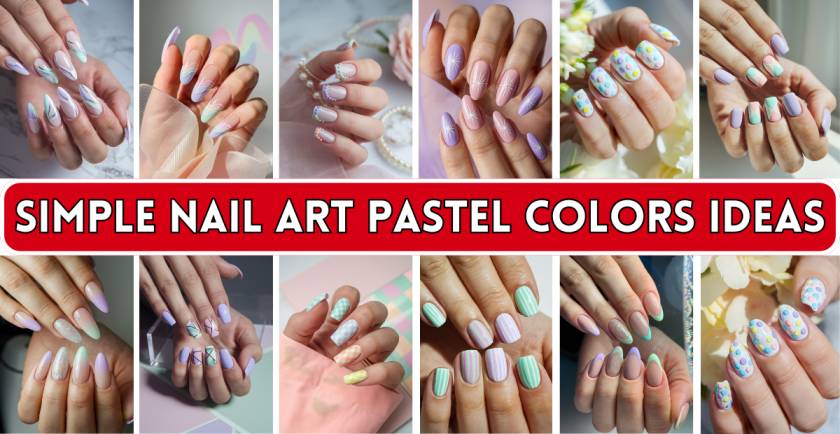
Many people who do nail art love pastel colors because they look soft, dreamy, and classy. They never go out of style and look great in any season, but especially in the spring and summer. If you want to add a little color to your normal look or get ready for a special event, pastel shades are a great choice. They keep things stylish and simple. Their soft tones look good on all skin types and are simple to mix and match.
This Simple Nail Art Pastel Colors Ideas guide is for you if you want to improve your nails in a creative and easy way. We’re showing you cool hairstyles that you can do at home, without having to go to the studio. These styles range from candy stripes to ombre fades and floral patterns. All of the ideas come with step-by-step steps and product suggestions to help you get salon-quality results at home.
When you click on certain links within my blog posts, it may lead you to a product page where you have the opportunity to make a purchase. Please note that if you decide to make a purchase through those links, I may earn a commission from the retailer or brand. For more information, please visit the Affiliate Disclosure page on my blog.
1. Pastel Color Block Nails

For a modern, color-blocked look, paint each nail with a mix of pastel colors in clean, geometric forms like triangles, squares, or diagonals. You can show off your favorite soft colors in a new and exciting way with this design. It’s an interesting style that’s still easy enough for newbies to learn.
How to Achieve:
To protect your nails, start with a base coat. Separate each nail into parts with striping tape, then use your chosen pastel colors to fill in the spaces. Take off the tape slowly before the polish dries. Add a shiny top coat to keep everything in place.
Products Needed:
- Sally Hansen Pastel Collection
- Striping tape
- Seche Vite Dry Fast Top Coat
2. Daisy Delight on Mint Green

Adding tiny white flowers to soft mint green nails gives them a cute, flowery look that’s great for spring or summer. The soft mix of pastel and flower colors is girly and fun, and it gives your manicure just the right amount of detail without making it look too busy.
How to Achieve:
As your base, put on two coats of mint green polish. To make petals, use a dotting tool or stick to make five white dots in a circle. Put a little yellow dot in the middle of each flower. For a smooth finish, seal with a top coat.
Products Needed:
- OPI “This Cost Me a Mint”
- White and yellow nail art polish or pens
- Dotting tool or toothpick
3. Pastel French Tips


Use baby pink, lavender, and peach on the tips of your nails to give the classic French manicure a soft, girly look. It adds some fun and color to a classic style while keeping it simple and clean, making it great for work or everyday wear.
How to Achieve:
Begin with a base coat that is clear or sheer pink. Once they are dry, use French tip guides or a steady hand to add light colors to the tips. You can paint each nail the same color or use a different pastel for each one to make a rainbow. Add a clear top coat to finish it off.
Products Needed:
- Sheer nude base coat
- Modelones Pastel Gel Polish Set
- French tip guides
4. Easter Egg Dots


This design is based on the fun and cuteness of Easter eggs and has pink polka dots on top of a soft base. It’s fun and quirky, and it’s a great way to add some fun to your nails. The random design makes it simple and forgiving for first-timers.
How to Achieve:
Choose any soft base color you like—lavender, pink, or baby blue are all good options. Put small dots of soft colors all over each nail with a dotting tool. You can change up the design or keep it the same, whichever you like better.
Products Needed:
- Pastel polish variety set
- Dotting tools
- Long-lasting top coat
5. Pastel Ombre Fade


Use two or more pastel colors that blend in perfectly to create a gentle ombre effect. You can achieve a salon-quality look at home with a little effort, and this beautiful gradient effect feels sophisticated and professional.
How to Achieve:
To highlight the pastel colors, apply a white background. To combine two pastel colors, dab them onto each nail with a cosmetic sponge, overlapping them in the middle. After repeating for opacity, use an acetone-dipped brush to wipe the area around your nails. For a smooth appearance, apply a final coat.
Products Needed:
- White base coat
- Zoya’s Pastel Dream Collection
- Makeup sponge
6. Rainbow Pastel Tips with Glitter

This style has a bit of sparkle and the elegance of pastel French tips. There is a light layer of glitter paint on top of each nail, and the tips are all different shades of pastel. It looks great on special events or when you want to add a little glitz to your look.
How to Achieve:
Start with a base shine that is sheer or clear. On the tip of each nail, use a different color polish. After the nail is dry, cover the whole thing with one layer of fine glitter paint. Add a shiny top coat to finish off the look.
Products Needed:
- Sheer nude base polish
- Variety of pastel nail colors
- ILNP “Birthday Suit” Glitter Top Coat
7. Pastel Candy Stripes


Pastel stripes give your nails a playful and nostalgic feel because they resemble candy canes or old-fashioned candies. Depending on your attire or attitude, stripes can be either vertical, horizontal, or diagonal. The playful style is ideal for gatherings in the spring or summer.
How to Achieve:
Put on a light pastel or white base. Using several pastel paints, make even stripes using a striping brush or nail tape. Prior to applying the next color, let each stripe dry. Apply a final application to round out any uneven areas.
Products Needed:
- Striping brush or nail tape
- Pastel polishes
- Base and top coat
8. Matte Pastel Nails with Accent Art

The velvety, modern look of matte pastel nails is different from the normal glossy finish. Use a heart, star, or cloud as a small ornament on one nail for a unique but understated touch. This outfit is great for people who like simple styles with a personal touch.
How to Achieve:
Change the color of each nail to a soft pink. After it’s dry, put on a matte top coat. Use a nail art pen, sticker, or fine brush to add a basic accent to one nail on each hand. Pick light colors for a smooth pattern that goes together.
Products Needed:
- Pastel polish collection
- OPI Matte Top Coat
- Nail art stickers or a fine brush for hand-drawn designs
9. Pastel Cloud Nails


When you paint your nails pastel cloud shapes, they look like they belong in a dreamy sky. This design is light, relaxing, and creative, with a base color of soft blue or purple and fluffy white clouds. It’s great for nail art fans who like to play with color.
How to Achieve:
Begin with a base color that is light blue, lilac, or green. To make clouds, dab on groups of white dots with a small dotting tool or sponge after the paint is dry. To make the edges look soft and fluffy, blur them a little. Put on a glossy top coat to make the difference stand out and finish the look.
Products Needed:
- Pastel base polish (such as Essie “Bikini So Teeny”)
- White polish or nail art pen
- Dotting tool or small sponge
- Quick-dry top coat
11. Pastel Negative Space Lines


Nail art with negative space is trendy and simple. This style leaves parts of the nail bare or clear between pastel-colored stripes or shapes. This makes for a striking and airy design that’s great for people who like simple but stylish looks.
How to Achieve:
You can make the pattern you want by putting striping tape across each nail either vertically, horizontally, or diagonally. Apply a pastel finish over the top, and then carefully peel off the tape, leaving some of the nail showing. Lastly, add a shiny or matte top coat.
Products Needed:
- Striping tape
- Pastel polishes in desired shades
- Base coat (optional for extra shine)
- Top coat (matte or glossy)
12. Pastel Starburst Nails


Starburst nails have tiny stars that spread out in soft pastel colors. They are great for a fun and space-themed manicure. It’s not too noticeable, but it gives your nails a magical touch.
How to Achieve:
As your base, use a lighter color. Add small star forms after the polish is dry. You can use a nail stamping kit, stickers, or a fine nail brush to do this. Add silver or white lines to make a burst effect that looks like stars twinkling.
Products Needed:
- Pastel base color (like pale peach, pink, or lavender)
- Nail stamping plate or star stickers
- Thin nail brush for detail work
- Optional glitter polish for added sparkle
13. Pastel Marble Nails


Marble nails look like the swirls and shapes that are naturally found in marble stone. This design looks soft, fancy, and very classy in pale colors. It makes your nails look expensive and spa-like.
How to Achieve:
Start with a white or basic pastel base. While the paint is still wet, use a fine brush or needle to swirl the small dots of different pastel colors around on your nail. Add a top coat to finish off the marbled look.
Products Needed:
- White or neutral base polish
- Two to three pastel shades
- Nail art brush or toothpick
- Glossy top coat
15. Pastel Swirl Nails


When done in different light colors, swirls give your nails a retro and fun look. They’re pretty to look at and seem harder to do than they really are.
How to Achieve:
A neutral or light color base is a good place to start. With other pastel colors and a fine brush, make wavy lines or swirly designs. Change the way the swirls are placed and the direction they go on each nail to keep the look interesting.
Products Needed:
- Neutral base polish
- Detail brush
- 2–3 pastel polishes in different shades
- Top coat
16. Pastel Checkerboard Nails


Checkerboard nails look cool, are retro, and are fun to wear. When done in soft colors like sky blue, peach, lavender, or peach, the effect is both bold and soft, great for a fun and trendy look.
How to Achieve:
You can use a neutral color or a light pink color. Once it’s dry, cut it into pieces with a thin brush or nail art tape. To make the checkerboard design, fill in each box with a different pastel color. Do this on all of your nails, or pick one or two to stand out.
Products Needed:
- Pastel polish set
- Striping tape or nail art brush
- Clear top coat
17. Pastel Butterfly Wings


In pastel colors, delicate butterfly wing designs give your nails a playful and romantic look. For spring, events, or when you feel like making something nature-inspired, this is the perfect pattern.
How to Achieve:
Start with a plain base or a gradient of pastel colors. Using a fine finishing brush and white or black polish, make the shape of butterfly wings by adding small dots and lines that look like the patterns on the wings. You can do a full-wing pattern on each nail, or you can add two butterflies together.
Products Needed:
- Gradient pastel base or single pastel shade
- Fine nail art brush
- White or black detailing polish
- Top coat for sealing
18. Pastel Watercolor Nails


With pastel colors, watercolor nails recreate the soft, flowing look of watercolor paintings. This style gives delicate and artistic looks that are both beautiful and abstract.
How to Achieve:
Put on a white basic coat. You can make pastel paints flow better by adding a few drops of acetone or nail polish thinner to a palette. Using a sponge or brush, dab the colors onto the nail and blend them together like painting. Set it aside to dry, then cover it with a shiny top coat.
Products Needed:
- White base polish
- Pastel colors
- Acetone or nail polish thinner
- Sponge or flat nail art brush
- Glossy top coat
19. Pastel Dot French Manicure

This variation on the French manicure uses a dotted arc composed of tiny pastel dots in place of the conventional line. It’s subtle, entertaining, and quite simple to replicate without exactitude.
How to Achieve:
Use a nude or sheer pink base. Put tiny pastel-colored dots around each nail’s tip curve using a dotting tool. For a rainbow appearance, you can use several pastel colors or keep it simple.
Products Needed:
- Sheer nude or pink polish
- Dotting tool or bobby pin
- Multiple pastel shades
- Top coat
21. Pastel Patchwork Nails


Blocks of various pastel colors are put together like fabric patches to create patchwork nails. It’s a warm, eccentric, and stylish design that encourages a lot of individuality.
How to Achieve:
Split each nail into two or more pieces with striping tape. Use a different pastel color to paint each area. To prevent bleeding, wait until one color dries completely before adding another. For added effect, you might use a fine brush to draw lines that resemble stitches.
Products Needed:
- Striping tape
- Pastel polish set
- Nail art brush for details
- Base and top coat
22. Pastel Leopard Print Nails

Leopard print and soft colors look great together for a trendy and stylish contrast. This pattern has animal print vibes and a soft color range that you can wear.
How to Achieve:
Start with a light base color. Make spots in a darker pastel or white color that aren’t round with a dotting tool or a small brush. Draw a thin line around some of the spots in black or a darker pastel color. To get the most out of it, keep it vague and random.
Products Needed:
- Pastel base polish
- Darker pastel or white for spots
- Thin brush or black polish pen
- Quick-dry top coat
24. Pastel Hearts Accent Nails


Heart-shaped pastel nails are very sweet and are great for Valentine’s Day or any time you want a soft, love-themed look. Little hearts add a delicate but passionate touch to the design.
How to Achieve:
You can use a soft pink or purple as a solid pastel color for your nails. On one or two accent nails, use a fine brush, stickers, or nail stamps in pastel colors that go well together to draw or put small hearts. You can center the hearts or spread them out across the nail for a fun look.
Products Needed:
- Base pastel polish (pink, peach, or lavender)
- Nail stickers, stamp kit, or fine brush for hearts
- Pastel shades for contrast
- Matte or glossy top coat
25. Pastel Geometric Nails


The use of soft colors in geometric nail art makes it look sleek, modern, and a little futuristic. If you want a balanced, clean look, use circles, diamonds, thin lines, and soft colors.
How to Achieve:
Cut the nail into geometric shapes with nail art tape. Use different soft colors to paint each part. A thin nail art brush and white or black paint can also be used to draw lines around shapes. This design looks great on longer nails or nails that are shaped like almonds.
Products Needed:
- Striping tape
- 2–3 pastel polishes
- Nail art brush for detailing
- Neutral base and top coat
26. Pastel Flame Nails


Flame nail art will give your pink manicure a little edge. Soft pink flames combine a bold pattern with a soft color scheme, making the outfit stylish and easy to wear.
How to Achieve:
Start with a base that is clear or very pale. With a brighter pastel color and a nail brush or stencil, make flame forms. Start at the very end and work your way down in a fire-like wavy pattern. The flames can be filled in all the way or left as lines for a less intense look.
Products Needed:
- Light pastel base
- Brighter pastel shade for flames
- Fine nail brush or stencil
- Clear top coat
27. Pastel Grid Lines


Grid nail polish makes your nails look like stylish little papers or rough digital patterns. If you use pastel colors with this structured design, it looks stylish and gives off a clean, magazine vibe. It’s perfect for someone who likes slight structure and order in their style.
How to Achieve:
Beginning with a white or very pale pastel color. Once the polish is dry, use a thin brush or striping tape to make thin lines across the nail in a light color that stands out. For an abstract look, you can make full squares or lines that aren’t in the middle of the paper.
Products Needed:
- White or light pastel base
- Thin striping brush
- Pastel polish in soft blue, green, or lavender
- Top coat
28. Pastel Rainbow Waves


This dreamy design makes waves of soft pastel colors that look like a rainbow that has melted. For summer, festivals, or a beachy vibe, it’s artistic, expressive, and feels like soft motion on your fingers.
How to Achieve:
Apply a base coat of white or pink paint. With three to four light colors and a thin nail brush, make wavy horizontal lines that flow together. To make a smooth shift between the colors, overlap them a little. Finish with a glossy top coat to make the paint move.
Products Needed:
- White or nude base
- Multiple pastel polishes (peach, blue, mint, pink)
- Nail art brush
- Glossy top coat
29. Pastel Glitter Fade


With a glitter gradient that begins at the tips or cuticles, pastel polish serves as the foundation for this delicate ombre glitter appearance. For special occasions or when you want something elegant with a hint of glitz, this delicate yet sparkling piece is ideal.
How to Achieve:
After applying pastel polish, allow it to dry. Starting at the tips (or cuticles), apply a glitter polish or loose glitter, fading it out as you proceed to the other end of the nail. Use a sponge to gently pat for a smoother gradient.
Products Needed:
- Pastel base polish
- Fine glitter polish (silver, iridescent, or holographic)
- Makeup sponge for blending
- Top coat
30. Pastel Puzzle Nails

Puzzle nails make a fun, striking statement with their interlocking shapes in various pastel colors. This style is excellent for a playful, young appearance that is striking yet still delicate and lovely.
How to Achieve:
Outline interlocking shapes with a puzzle stencil or striping tape. For the whole puzzle effect, fill in each section with a distinct pastel hue, and after it dries, outline each piece with a fine black or white gloss. works best on nails that are medium to long.
Products Needed:
- Pastel polish set
- Nail art brush or puzzle stencil
- Detail brush for outlines
- Base and top coat
31. Pastel Marble Swirls


Idea:
Use pastel colors like lavender, green, and baby pink to make a marble-like, dreamy look. This design is soft and artsy, and it’s great for people who want a one-of-a-kind, hand-painted look. The swirls give it a bit of class while keeping the mood light and fun. You can wear your nails short or long with this style.
How to Achieve:
To make the swirl colors stand out, use a white or light pink base coat. While the paint is still wet, use a small brush or toothpick to swirl two or three pastel colors together on the nail’s surface. You can also do the water marble look by dropping polish into a bowl of water, using a toothpick to make swirls, and then putting your nail into the design. Seal the marble look with a shiny top coat.
Products Needed:
- White or light pastel base polish
- Pastel nail polish shades (e.g., lavender, mint, pink)
- Small brush or toothpick
- Top coat
32. Pastel Chevron Nails


Adding pastel chevron designs to your nails is a fun and modern way to make them look more geometric. This design is great for people who want something bold but still girly because of the sharp lines and soft colors that stand out. It’s also a fun way to try out different light colors together in one look.
How to Achieve:
Put on a base coat and wait for it to dry. Mark the chevron shape on each nail with chevron nail vinyls or stripe tape. You can use any soft colors you want to fill in the spaces. Do not take off the tape or stickers until they are completely dry. Add a shiny top coat to make it look clean and professional.
Products Needed:
- Base coat
- Chevron nail vinyls or striping tape
- Pastel nail polishes
- Top coat
33. Pastel Glitter Gradient


A glitter gradient is a great way to add a little sparkle to your pink nails. For a soft, shimmery look, start with a basic pastel base and add glitter from the tips up. This style is great for adding a little glitz while keeping the look light and easy to wear.
How to Achieve:
Put on a soft base color and wait for it to dry fully. Put a small amount of glitter paint on the tip of each nail with a makeup sponge. As you move down the nail, the polish will become less intense. This makes an image of gradient shimmer. Use acetone to get rid of any extra glitter around the nails, and then seal with a top coat.
Products Needed:
- Pastel base polish
- Fine glitter polish
- Makeup sponge
- Top coat
34. Pastel Animal Print


To make your outfit more fun and stylish, use pastel-colored animal prints like leopard or cow spots. This pattern is a bold take on an old favorite. The soft pastel colors make it look new and up to date.
How to Achieve:
Use a light color like light pink or purple as a base for your nails. Use a dotting tool or a thin brush and different pastel colors to make animal print spots after the paint is dry. For a leopard look, use black or a darker pale color to outline the dots that aren’t round. Use soft white and light brown or gray for a cow print.
Products Needed:
- Pastel base polish
- Thin brush or dotting tool
- Black nail art polish (optional for outlines)
- Top coat
35. Pastel Negative Space Nails

Designs for negative space are stylish and contemporary. You may create a simple yet striking look that seems clean, fresh, and modern by leaving certain areas of the nail bare and filling up others with pastel hues.
How to Achieve:
After applying a base coat, allow it to dry. Block off the areas you wish to keep clear with nail vinyl or striping tape. Apply pastel polish to the remaining area in curves, lines, or geometric forms. For precise edges, remove the tape while the polish is still wet, then apply a top coat.
Products Needed:
- Base coat
- Nail tape or vinyl stickers
- Pastel nail polishes
- Top coat
Tips for Perfecting Your Pastel Nail Art
- Always start with a white base coat when using very light pastels so that the color shows through better.
- Let each coat dry completely before adding the next one to keep the paint from mixing or smudging.
- Use a good quick-dry top coat to make your image last longer and protect it.
- Clean the ends of your nails with a flat brush dipped in acetone for a neat look.
Where to Buy Nail Art Products Online
- Amazon – Ideal for affordable kits and beginner tools.
- Ulta Beauty – Great selection of salon-quality polishes.
- SHEIN or Temu – Inexpensive nail art tools, stickers, and pastel press-ons.
- Dashing Diva or Olive & June – Stylish pastel press-ons and wraps for DIY users.
Final Thoughts
Because there are so many ways to be creative, colorful nail art lets you show off your personality, mood, and the season. Yes, these Simple Nail Art Pastel Colors Ideas have something for everyone, no matter what style they like or how skilled they are. Plus, you can do most of these patterns from the comfort of your own home with only a few simple tools.
Each week, you can try a new design. You can also mix ideas or have a colorful nail party with your friends. Not only are these soft, pretty looks fun to make, but they will also get you lots of praise.