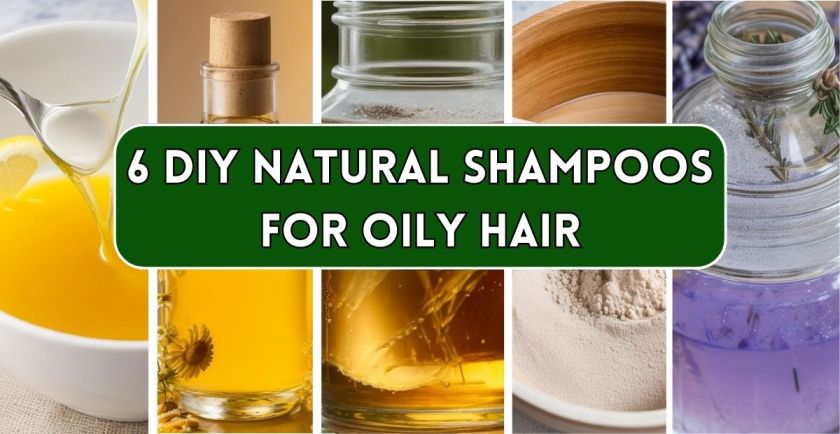
We all have experienced the agony of dealing with oily hair that behaves strangely. Don’t worry, though, because there’s a natural solution that not only tackles oil but also supports the environment: DIY natural shampoos for oily hair. In this article, we will explore the benefits of homemade DIY natural shampoos and simple recipes to help you say goodbye to the problems associated with oily hair.
Understanding Oily Hair: The Battle We Face
Oily hair, often caused by the overactivity of sebaceous glands, can leave us feeling like our hair has its own agenda, which is frequently the result of overactive sebaceous glands. Regular washing turns into the norm, which can cause further scalp problems. Enter the world of homemade DIY natural shampoos to reclaim harmony and control over your hair.
Benefits of DIY Natural Shampoo: Nurturing Your Hair and Nature
In a world where chemical-laden products dominate the market, the allure of DIY natural shampoo for oily hair shines brightly. Beyond the quest for beautifully balanced tresses, this natural alternative extends its benefits far and wide, encompassing your hair’s health and the well-being of our planet.
1. Chemical-Free Goodness:
One of the standout advantages of DIY natural shampoos is their escape from the harsh chemicals that often find their way into commercial products. These chemicals can strip your hair of its natural oils, leading to a vicious cycle of overproduction and increased oiliness. By crafting your own shampoo, you take control over the ingredients, ensuring a delicate and natural cleansing experience for your hair.
2. Custom-Tailored Formulas:
Your hair is as unique as you are, and it deserves a shampoo that caters specifically to its needs. With DIY natural shampoos, you become the alchemist, blending ingredients that suit your hair type and concerns. Whether it’s using aloe vera to soothe an irritated scalp or infusing herbal essences for extra nourishment, you can create a personalized potion that transforms your hair care routine into a luxurious experience.
3. Environmental Harmony:
Beyond the confines of your bathroom, DIY natural shampoos contribute to a more sustainable world. Traditional shampoos often come packaged in plastic bottles that contribute to the global plastic crisis. By switching to DIY alternatives, you reduce your plastic footprint and embrace a more eco-friendly approach to personal care. Glass containers, reusable packaging, and minimal waste become your allies in this noble endeavor.
4. Budget-Friendly Magic:
Let’s face it – the quest for healthy hair can sometimes dent your wallet. Commercial products, with their fancy marketing and promises, can strain your budget. DIY natural shampoos, on the other hand, offer cost-effective solutions that don’t compromise on quality. Ingredients like castile soap, essential oils, and herbs are not only affordable but also versatile, providing long-term value for your hair care regimen.
5. Connection with Nature:
Creating your own natural shampoo fosters a deeper connection with the natural world. As you explore various herbs, oils, and extracts, you gain an appreciation for the bountiful resources nature provides. This newfound connection can extend beyond your hair care routine, influencing other aspects of your lifestyle as you explore more sustainable choices.
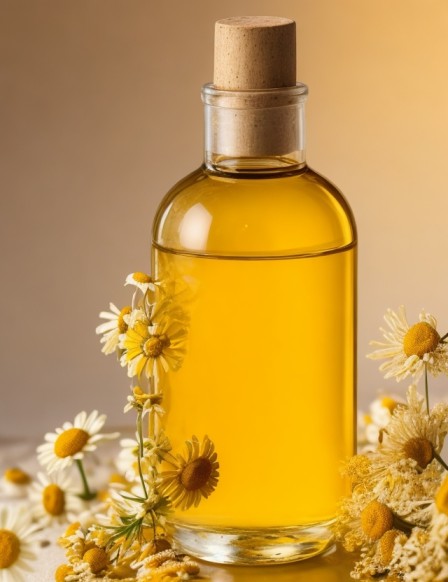
DIY Natural Shampoos for Oily Hair Recipes:
1. Lemon and Aloe Vera Clarifying Shampoo:

The Lemon and Aloe Vera Clarifying Shampoo combines the astringent properties of lemon with the soothing effects of aloe vera. Lemon helps regulate excess oil production on the scalp, promoting a fresher, less oily feel. Aloe vera’s natural moisturizing and healing qualities balance the formula, nurturing the scalp and aiding in healthy hair growth.
Ingredients:
- 1/2 cup aloe vera gel
- 1 tablespoon lemon juice
- 1 teaspoon honey (optional, for extra moisture)
Instructions:
- Mix aloe vera gel, lemon juice, and honey (if using) in a bowl until well blended.
- Apply the mixture to wet hair, massaging it gently into the scalp.
- Leave it on for a few minutes to allow the ingredients to work.
- Rinse thoroughly with lukewarm water.
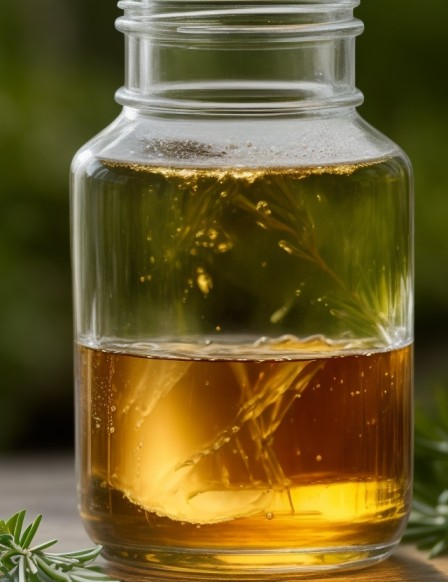
2. Tea Tree and Peppermint Cleansing Shampoo:
Revitalize your scalp and control oiliness with the Tea Tree and Peppermint Cleansing Shampoo. Tea tree oil’s potent antibacterial properties combat excess oil, while peppermint oil refreshes and stimulates circulation. This dynamic duo promotes a cleaner, healthier scalp.
Ingredients:
- 1/2 cup liquid Castile soap
- 10 drops of tea tree essential oil
- 5 drops peppermint essential oil
- 1 teaspoon jojoba oil (optional, for added moisture)
Instructions:
- In an empty bottle, combine liquid Castile soap, tea tree essential oil, peppermint essential oil, and jojoba oil (if using).
- Shake well to mix the ingredients thoroughly.
- Wet your hair and apply a small amount of the mixture to your scalp, working it into a lather.
- Rinse with water and follow with a light conditioner if needed.
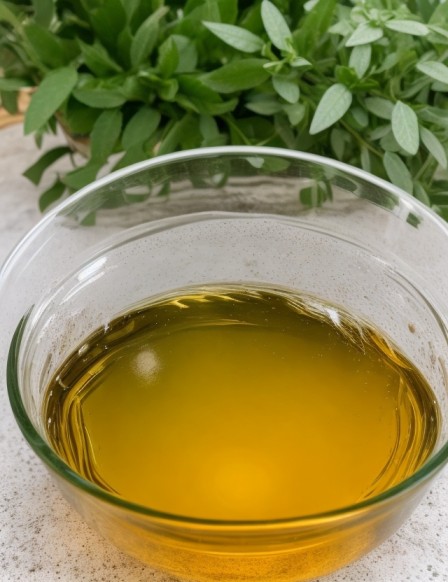
3. Clay and Apple Cider Vinegar Balancing Shampoo:

Discover the Clay and Apple Cider Vinegar Balancing Shampoo, a natural remedy to combat oily hair. Bentonite clay, known for its absorbent properties, purifies the scalp by absorbing excess oil and impurities. Apple cider vinegar restores the scalp’s pH balance, fostering a healthier environment.
Ingredients:
- 2 tablespoons bentonite clay
- 1/4 cup apple cider vinegar
- 1/4 cup water
- 5-7 drops of lavender or rosemary essential oil (for scent and added benefits)
Instructions:
- Mix bentonite clay, apple cider vinegar, water, and essential oil in a bowl to form a smooth paste.
- Wet your hair and apply the clay mixture to your scalp, gently massaging it in.
- Let the mixture sit on your scalp for about 5 minutes.
- Rinse thoroughly with water, making sure all the clay is washed out.
4. Rosemary and Lavender Herbal Shampoo:
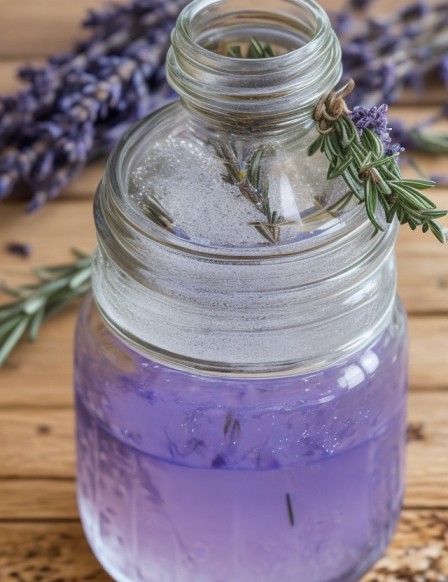
Indulge in the rejuvenating qualities of the Rosemary and Lavender Herbal Shampoo, a harmonious blend for managing oily hair. Rosemary, with its invigorating properties, promotes scalp health by stimulating hair follicles and controlling excess oil production. Lavender’s calming essence soothes the scalp, while its delightful aroma enhances the experience.
Ingredients:
- 1/2 cup unscented liquid Castile soap
- 1 teaspoon dried rosemary leaves (or a few drops of rosemary essential oil)
- 1 teaspoon dried lavender flowers (or a few drops of lavender essential oil)
- 1/4 cup water
Instructions:
- In a bottle, combine liquid Castile soap, dried rosemary, dried lavender, and water.
- Let the mixture sit for a day to infuse the herbal scents.
- Wet your hair and apply a small amount of the mixture to your scalp, working it into a lather.
- Rinse thoroughly with water.
5. Baking Soda and Tea Tree Oil Cleansing Shampoo:
Elevate your hair care routine with the Baking Soda and Tea Tree Oil Cleansing Shampoo, a dynamic duo that combats oiliness and maintains scalp health. Baking soda’s gentle exfoliating properties clear away excess oil and residue, while tea tree oil’s antibacterial strength ensures a clean and refreshed scalp.
Ingredients:
- 2 tablespoons baking soda
- 1/4 cup water
- 5-7 drops of tea tree essential oil
Instructions:
- Mix baking soda and water to create a paste.
- Add tea tree essential oil and blend well.
- Apply the mixture to wet hair, gently massaging it into the scalp.
- Rinse thoroughly and follow with a light conditioner if needed.
6. Chamomile and Witch Hazel Soothing Shampoo:
Experience the tranquil benefits of the Chamomile and Witch Hazel Soothing Shampoo, a harmonious blend that addresses oily hair concerns with gentle effectiveness. Chamomile’s calming essence works to reduce excess oil production while soothing the scalp, promoting balance. Witch hazel, a natural astringent, assists in regulating oil levels and maintaining scalp health.
Ingredients:
- 1/2 cup chamomile tea (brewed and cooled)
- 1/4 cup unscented liquid Castile soap
- 2 tablespoons witch hazel
Instructions:
- Brew chamomile tea and let it cool.
- In a bottle, combine chamomile tea, liquid Castile soap, and witch hazel.
- Shake well to mix the ingredients.
- Wet your hair and apply the mixture to your scalp, working it into a lather.
- Rinse thoroughly with water.
Also Read-
Application and Usage:
Congratulations, you’ve crafted your very own DIY natural shampoo for oily hair! Now comes the exciting part – applying and using it to achieve the lustrous locks you’ve been dreaming of. This straightforward process ensures that you make the most of your customized creation, leaving you with hair that feels refreshed, balanced, and oh-so-gorgeous.
1. Preparing for the Experience:
Before you step into the shower, gather your DIY natural shampoo and any other hair care essentials you might need, such as a wide-tooth comb or a shower cap. If you’re using an herbal infusion shampoo, make sure it’s properly strained and ready for action.
2. Wetting Your Hair:
Begin by thoroughly wetting your hair with lukewarm water. Water that’s too hot can strip your hair of its natural oils, while water that’s too cold might not effectively open up the hair cuticles for cleansing. Lukewarm water strikes the perfect balance.
3. Dispensing and Applying the Shampoo:
Depending on the consistency of your DIY natural shampoo, you can either pour a small amount directly onto your scalp or into your hands. Gently work the shampoo into your scalp, using your fingertips to massage in circular motions. This not only cleanses your scalp but also promotes blood circulation, which can be beneficial for hair growth.
4. Working Through the Lengths:
After focusing on your scalp, work the shampoo down the lengths of your hair. Avoid vigorously scrubbing the ends, as they’re more delicate. Instead, let the lather gently cleanse as it travels down. If your shampoo doesn’t lather much, don’t worry – it’s still doing its job.
5. Enjoying the Lather:
While commercial shampoos often produce abundant lather, DIY natural shampoos may not foam as much due to the absence of synthetic foaming agents. Don’t let this concern you; the absence of excessive lather doesn’t imply inefficacy. Instead, relish the natural cleansing process that’s happening.
6. Rinsing Thoroughly:
Thoroughly rinse your hair until the water runs clear, ensuring that all traces of shampoo are washed away. This step is crucial to prevent any residue buildup that might leave your hair feeling weighed down.
7. Conditioning (If Desired):
If you prefer, you can follow up with a natural conditioner to add extra hydration and manageability to your hair. A diluted apple cider vinegar rinse (1 part vinegar to 3 parts water) can work wonders as a natural conditioner and clarifier. Make sure to rinse thoroughly afterward.
8. Drying Your Hair:
Gently pat your hair with a soft towel to remove excess water. Avoid vigorous rubbing, as wet hair is more delicate and prone to breakage. If you’re using heat styling tools, ensure your hair is completely dry before applying any heat to prevent damage.
Precautions and Allergies: Prioritizing Your Hair’s Safety
Before you dive headfirst into your DIY natural shampoo journey, a patch test is essential to ensure allergies don’t dampen the experience. If you have sensitive skin or any doubts, consult a dermatologist for that added peace of mind.
Transitioning to Natural Shampoo:
Embarking on a journey from commercial shampoos to DIY natural alternatives can be both exciting and slightly challenging. As you transition, your hair and scalp might experience adjustments, but fear not – this phase is temporary, and the rewards are worth the patience. Let’s dive into the process of transitioning to natural shampoo and how you can navigate it with ease.
1. Embrace the Adjustment Period:
Switching from commercial shampoos, laden with synthetic chemicals, to DIY natural shampoos requires a brief adjustment period. Your hair and scalp have become accustomed to the effects of commercial products, and they need time to adapt to the new, gentler cleansing method.
2. Expect Initial Changes:
During the initial weeks of transitioning, you might notice changes in your hair’s texture and oiliness. This is perfectly normal as your scalp recalibrates its oil production in response to the absence of harsh chemicals. Don’t be discouraged; these changes are signs that your scalp is finding its natural balance.
3. Gradual Reduction of Oiliness:
Commercial shampoos often strip the scalp of natural oils, prompting it to produce more oil to compensate. With natural shampoo, your scalp learns to regulate oil production without interference. As your scalp adjusts, you’ll likely experience a reduction in excess oiliness over time.
4. Gentle Cleansing Routine:
During the adjustment phase, consider using your DIY natural shampoo every other wash or as needed. If you’re feeling a bit greasier than usual, a simple water rinse can help freshen up your hair without over-cleansing. Gradually, you’ll find a routine that suits your hair’s needs.
5. Avoid Over-Washing:
Resist the urge to wash your hair daily, especially during the transition. Frequent washing can disrupt your scalp’s natural balance and impede the adjustment process. Instead, extend the time between washes to allow your scalp to regulate itself.
6. Incorporate Apple Cider Vinegar Rinse:
An apple cider vinegar (ACV) rinse can be a game-changer during the transition. Dilute 1 part ACV with 3 parts water and use it as a final rinse after shampooing. ACV helps balance pH, close hair cuticles, and combat any residue, leaving your hair refreshed and shiny.
7. Be Patient and Kind to Yourself:
Transitioning to natural shampoo is a journey of patience and self-care. Understand that your hair’s response might not be immediate, but it will happen gradually. Be gentle with yourself during this process and trust that your hair will find its equilibrium.
8. Monitor Your Hair’s Progress:
Keep track of your hair’s journey during the transition. Note how your hair texture, oiliness, and overall health improve over time. This can be motivating and reassuring as you see the positive changes unfold.
9. Stay Committed to the Change:
As your hair adjusts and your scalp finds its natural rhythm, stay committed to your decision to embrace natural shampoo. The long-term benefits for your hair’s health and the environment will far outweigh the temporary adjustments.
Tips for Maintaining Healthy Hair:
While DIY natural shampoo plays a significant role in achieving lustrous locks, maintaining healthy hair goes beyond the cleansing routine. By adopting a holistic approach to hair care, you can enhance the benefits of your natural shampoo and promote overall hair health. Here are some valuable tips to keep your tresses in their best condition:
1. Mindful Diet for Hair Health:
Just as your body needs proper nutrition, your hair also thrives on a balanced diet. Incorporate foods rich in vitamins and minerals like Biotin (Vitamin H), Vitamin E, Omega-3 fatty acids, and protein. These nutrients contribute to strong, vibrant hair growth.
2. Stay Hydrated:
Hydration is key to healthy hair. Drinking enough water ensures your hair follicles receive the moisture they need for optimal growth. Hydrated hair is less prone to breakage and looks more lustrous.
3. Gentle Hair Care Routine:
Handle your hair with care, starting from the moment you step into the shower. Use a wide-tooth comb to detangle your hair before shampooing, and avoid vigorous rubbing with a towel. Treat wet hair delicately to minimize breakage.
4. Regular Trims:
Even if you’re aiming for long locks, regular trims are essential to maintaining healthy hair. Trimming every 6-8 weeks helps prevent split ends from traveling up the hair shaft and keeps your hair looking fresh.
5. Protect Your Hair from Heat:
Excessive heat styling can lead to damage and dryness. If you use heat tools, always apply a heat protectant spray before styling. Consider air-drying or using lower heat settings to minimize damage.
6. Sleep on Silk:
Swap your cotton pillowcase for a silk or satin one. These materials create less friction against your hair, reducing tangling and breakage. They also help retain your hair’s natural oils, leaving it less prone to dryness.
7. Scalp Massage:
Treat yourself to regular scalp massages. Massaging your scalp with your fingertips stimulates blood flow, which can promote hair growth and overall scalp health.
8. Protect Your Hair from UV Rays:
Sun exposure can lead to hair damage, such as fading and dryness. If you’ll be out in the sun for an extended period, consider wearing a hat or using hair products with UV protection.
9. Avoid Tight Hairstyles:
Constantly pulling your hair into tight hairstyles can cause stress on the hair shaft and lead to breakage. Opt for looser styles and vary your hairstyles to avoid strain on specific areas.
10. Manage Stress:
Stress can impact your hair’s health. Practice stress management techniques such as meditation, yoga, or deep breathing to keep your body and hair in balance.
11. Use Natural Brushes:
Invest in a quality boar bristle brush. These brushes distribute your hair’s natural oils from root to tip, promoting shine and overall hair health.
12. Listen to Your Hair:
Pay attention to your hair’s needs. If you notice changes in texture, oiliness, or overall health, adjust your routine accordingly. Your hair’s condition can vary based on factors like the weather and your overall health.
FAQs (Frequently Asked Questions)
Q1: Can I switch to DIY natural shampoo if I have oily hair?
Absolutely! DIY natural shampoo is a fantastic option for oily hair. Ingredients like tea tree oil and apple cider vinegar help balance oil production, leaving your hair refreshed and less greasy.
Q2: Will my hair become oily during the transition to natural shampoo?
It’s possible. As your scalp adjusts to the gentler cleansing of natural shampoo, it might temporarily produce more oil. This adjustment period is temporary, and your hair will find its balance.
Q3: Can I customize the DIY natural shampoo for my specific hair type?
Yes, that’s the beauty of it! You can tailor your DIY shampoo to suit your hair’s unique needs by choosing ingredients that address issues like oiliness, dryness, or dandruff.
Q4: How often should I use DIY natural shampoo?
This depends on your hair’s needs and the transition phase. Initially, you might use it every other wash to help your scalp adjust. As your scalp finds its balance, you can adjust the frequency accordingly.
Q5: Will natural shampoo lather like commercial shampoos?
Natural shampoos might not produce as much lather due to the absence of synthetic foaming agents. However, the absence of abundant lather doesn’t affect their effectiveness.
Q6: Can I use a natural conditioner with DIY natural shampoo?
Absolutely. You can follow up your shampoo routine with a natural conditioner or even a diluted apple cider vinegar rinse for added shine and manageability.
Q7: How can I prevent hair breakage while transitioning to natural shampoo?
Handle your hair gently, especially when wet. Use a wide-tooth comb to detangle, avoid rubbing your hair vigorously with a towel, and consider protective hairstyles to minimize breakage.
Q8: Can I use DIY natural shampoo on colored or treated hair?
Yes, you can. However, do a patch test first to ensure that the ingredients won’t negatively affect your hair color. Natural shampoos are generally gentler on colored hair.
Q9: Are there any side effects of using natural shampoo for oily hair?
Natural shampoo is generally well-tolerated, but some individuals might experience an adjustment period with changes in oiliness or texture. This is temporary and part of the transition process.
Q10: Can I use natural shampoo if I have a sensitive scalp?
Yes, but it’s wise to do a patch test before fully incorporating it into your routine. Some ingredients, even natural ones, can cause reactions in sensitive individuals. Consulting a dermatologist is a good step if you have concerns.
Conclusion:
With DIY natural shampoo for oily hair, you’re not just embarking on a hair care routine – you’re embracing a holistic approach that’s both nurturing for your locks and gentle on the planet. So, say goodbye to oily hair frustrations and say hello to a more sustainable, beautiful you.
Additional Resources: Diving Deeper into Natural Hair Care
For those eager to learn more about natural hair care, ingredient sourcing, and sustainability, we’ve curated a list of resources that will further guide you on this exciting journey.
Remember, your DIY natural shampoo adventure isn’t just about your hair – it’s about embracing a lifestyle that harmonizes with nature and celebrates the beauty within you. Say hello to radiant, healthy tresses, and wave goodbye to oily hair woes!
